By: Alex
OK, you’re convinced. You want to set up a grow room and raise plants indoors…but where do you start?
If you’re new to this, stick to the basics and keep things simple.
Step 1. Find a suitable setup space (spare room, garage, etc)
Step 2. Make your space light-tight
Step 3. Choose how to configure your space (e.g. tent, entire room or cupboard within a room)
Step 4. Get good light coverage in your setup
Step 5. Set up suitable air exchange
Step 1: Find A Space
Here’s what you should think about with every grow room setup:
Is It Big Enough?
Almost any space can be used as for grow room setup. You can either convert a whole room or cupboard into a grow room, or use a grow tent.
Are You Near A Power Supply?
For a one light or two light set up, a couple of normal double wall sockets will be fine. You can always use an extension lead if you need to.
Are You Near A Water Source?
You should never use unfiltered rain water – you never know what you’re feeding plants. The best water you can use is pure, filtered water. Read more on the importance of water here.
Will Noise Be An Issue?
Lights, pumps and your fan can make some noise. Bear this in mind with your setup.
What’s The Flooring Like?
Don’t grow straight onto carpeted floors. They hold moisture (spillages!) and harbour bugs and bacteria. You can put reflective sheeting down, or grow in a tent.
Step 2: Create A Light Tight Environment
If there’s a small window or natural light source in your grow room setup, block it off or light trap the area with Total Blackout Reflective Sheeting.
Reflective sheeting does two great things.
Firstly, it stops light escaping
Secondly, it keeps natural light out of your setup. This way it doesn’t interfere with your lighting cycle.
Plants get confused and stressed if they’re exposed to light on an inconsistent basis…like you would be if your room suddenly illuminated in the middle of the night!
Plants get confused and stressed if they’re exposed to light on an inconsistent basis…like you would be if your room suddenly illuminated in the middle of the night!
There are several types of grow room sheeting – including Orca and Reflex Diamond. Read more about reflective sheeting here.
Step 3: Configure Your Setup
Once you’ve found a suitable area, you need to work out how to configure your space.
Option 1: Use an entire room setup
Option 2: Create a room in a room (typically with a grow tent setup)
Option 3: Convert an enclosed space (like a cupboard)
Whichever option you choose, make sure the size of your area is suitable for the intensity of your grow lights.
If your light isn’t intense enough, plants will under perform. If it’s too intense, you’ll likely have heat problems and harm your plants.
Option 1: Whole Room Setup
In a large, empty room, one grow light won’t be enough.
You’ll need around 1 x grow light (lamp + ballast + reflector) for every 1.2m x 1.2m space as a minimum.

However, in any large room, it’ll be easier to control your climate if you fill it with tents.
If you had a 6m x 3m room, rather than using the room itself as a grow room, you might be better off filling it with two Titan+ BudBox Grow Tent or two 2.4m x 2.4m BAY6 Grow Tent :

Option 2: Room In A Room Setup
The best and cheapest way to create a grow room is with a grow tent.
You’ll find it much easier to:
- Maintain the optimum climate (e.g. temperature, humidity)
- Prevent bug infestations and diseases
- Minimise light loss
- Protect the rest of the room from the heat and humidity in your tent
The tent you need dependd on what you’re growing, and what lights you’re using in your setup.
If you have high intensity lights or taller growing plants, you’ll need bigger, taller tents.
For mother plants, cuttings and seedlings, you’ll only need a small tent for your setup.
Option 3: Convert An Enclosed Room Setup
When you’re planning on growing in a small space, you may encounter heat problems in your setup.
To prevent this:
- Choose a high space (at least 5ft is good – ideally you want more)
- Use nothing more powerful than a 250 – 315W Light
- Ensure there’s a constant flow of new air in your setup
If you don’t have much headroom, try using a smaller light like a T5 Grow Light because it’ll produce less heat. However, as T5 Grow Lights are designed for propagation, we’d suggest you find a bigger area.
To get a constant flow of cool air:
- Use an extractor fan to take hot air away from the top of the area
- Make sure there are input holes (even better, with air input fan) to force new air in
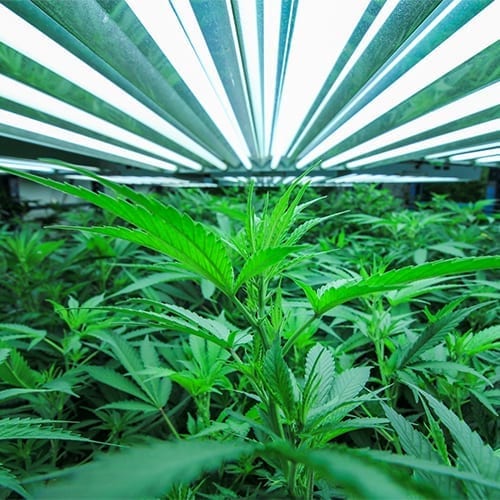
Step 4: Get The Right Light System
There are lots of lights to choose from. You’ll need at least one lof them
What’s A Grow Light?
A typical grow light (aka lighting system) is made up of:
- Ballast: for regulating and controlling the supply of energy needed to power the light
- Lamp: for actually generating the light
- Reflector: for guiding as much of the light produced down towards your plants
You will definitely need a main grow light. To improve your quality of light, people often use supplement lighting, too.
Main Grow Lights:
In the past, growers often used a metal halide (MH) lamp during vegetative growth then switched to a sodium for flowering.
Now, however, a lot of growers use a Dual Spectrum HPS (High Pressure Sodium) light throughout.
- Metal Halide: Great for vegetative growth (produce more blue light)
- Sodium: Great for flowering (produce more red light)
- Dual Spectrum HPS: For vegetative & flowering (produce blue & red light)
- LED’s: For use throughout your grow (here’s how to pick a good LED)
- Fluorescent Lights: For propagation, often used with a BAY6 Dual Use Propagation tent
These grow lights mostly emit the wavelengths of light your plants use for growth, known as the PAR range (400nm – 700nm).
Supplemental Grow Lights
Supplemental grow lights are used to broaden your spectrum. They mostly emit wavelenths outside the PAR range – like UVA & UVB. Wavelengths outside the PAR range aren’t used for growth, but they’re known to enhance yield quality.
- Plasma: Tend to have more wavelengths outside the PAR range (read more here)
- CDM: Have lot of wavelengths outside the PAR range, but more wavelengths inside the PAR range than Plasma lights. With the right reflector and bulbs, you can sometimes use a CDM as a main grow light. (read more here)
You don’t have to use a supplemental grow light, but you’ll get far better results if you do.
Choosing A Grow Light
When choosing a light, you need to be realistic about:
- The light’s power consumption rate (and your budget)
- The light output (read more here)
- How much space is available in your setup (your grow space will need to support the light)
| Top Tip: Run Lights at Night |
|---|
| A lot of growers have their lights on during the night and their lights off during the day.
Why? Because it’s cheaper:
To make checks and carry out tasks in your grow room during the day when the lights are most likely to be switched off, we recommend using an Active Eye Head Lamp. |
Step 4: Set Up An Air Exchange System
As a beginner, the easiest way to control your climate is with an air exchange system.
Why?
Plants constantly consume CO2 and release moisture. Your lights produce heat.
You’ll need to replace stale, CO2 depleted, hot, moist air with fresh, CO2 rich air.
How?
What you need will depend on:
- Your lights
- The size of your grow space
- The time of year (more air needs to be extracted during summer months)
As a general rule, the more lights you have, the better your air exchange system needs to be.
Extractor Fans
Extractor fans draw air out of your grow room. To work out how many you need in your setup:
STEP 1
Multiply your tent’s L x W x H
The answer is how much space is covered by your grow lights
| example: |
|---|
| In a XL BAY6 Tent:
1.2m x 1.2m x 2m = 2.88m3 2.88m3 is the total area covered by your lights. |
STEP 2
Multiply this by 60
That’ll tell you how much air to extract every hour.
| example: |
|---|
| In a XL BAY6 Tent:
2.88m3 x 60 = 172.8m3 A 100mm (4″) RVK100 would do the trick! |
STEP 3
To be really precise, you can:
- Add 20% for a warm attic
- Add 20% if using a carbon filter
- Minus 15% in a cool basement
- Add 20% for long ducting
- Minus 25 – 30% for air cooled lighting
Something else to consider is that south facing grow room setups are hotter than north facing rooms. You may want to increase the size of your extractor fan in south facing rooms.
If in doubt, it’s best to over spec than under spec. To be on the safe side, use a fan speed controller. They’ll speed fans up or slow them down, depending on how hot your room is.
Extractor fans are normally on for 24 hours a day when used with carbon filters (for odour removal).
Smaller extractor fans are typically quite quiet, but larger ones tend to produce some noise. If noise is an issue for you, use an EC fan.
Intake Fans
Remember air needs to enter the room as well as leave it.
If you have a small grow room setup with only 1 x 600W light, it will normally be OK to use a series of vents to draw air in.
In a larger room setups, you will need an air intake fan.
Your input fan should be 15 – 20% less powerful than your extractor fan.
If you’re using an intake fan and extraction fan, they ideally need to be positioned in opposite corners of the growing area.
Basic Grow Room Safety
Grow light systems are very safe.
They only need a few hundred watts – like a lot of household electrical items. You just need to apply common sense.
Here are a few tips:
- Use cable ties when necessary to keep wiring neat and out of the way
- Ensure ballasts and other electrical devices don’t come into contact with water unless specifically designed to do so – e.g. nutrient heaters and water pumps.
- From time to time check all installations, connections and wiring.
- Make sure equipment is not accessible to children or animals.
- Read instructions and safety information where applicable, especially where aggressive liquids are concerned.
- Consider installing a fire extinguisher that has been specifically designed for a grow room.
- Always uncoil extensions and don’t coil up the reflector cables – otherwise, they can get hot and even burn.
Source: www.growell.co.uk